postgresqlでupdate insert
ある条件に当てはまるデータが登録済みならupdate、なければinsertをしたい。
結論からいうとONCONFLICTを使えばよいです。
ONCONFLICT
ONCONFLICTが使えるのはPostgresql 9.5以上、
ONCONFLICTに指定する項目はUNIQUE制約である必要があります。
INSERT
INTO test_table(
    id
    , point
    , time
)
VALUES (
    '1'
    , 100
    , '2020/08/20 10:00:00.000'
)
    ON CONFLICT(id) DO UPDATE
SET
    point = 100;
CTE
ONCONFLICTが使えない場合は、CTEを使うことで同じことができます。
WITH new_values (id, point, time) as (
  values
     ('1', 100, '2020/08/20 10:00:00.000'::timestamp)
),
upd AS (UPDATE test_table SET point = 100
               WHERE id = '1' RETURNING *)
INSERT INTO test_table(id, point, time)
SELECT (id, point, time
FROM new_values WHERE not exists (SELECT id FROM upd where upd.id = new_values.id);
ただし、UNIQUE制約がついてないため、重複する可能性があります。
重複が許されないシステムの場合、ONCONFLICTが使えるようにテーブル設計変更をおすすめします。
参考
- PostgreSQLで「あればUPDATE、なければINSERT」のUPSERTをやってみる
- PostgreSQL 9.5 UPSERTを試してみた - 日々の記録 別館
- PostgreSQLでのUPSERT(INSERT or UPDATE)処理を検証する - ほんじゃらねっと
- https://www.it-swarm.dev/ja/sql/postgresql%E3%81%A7%E3%81%AE%E9%87%8D%E8%A4%87%E6%9B%B4%E6%96%B0%E6%99%82%E3%81%AB%E6%8C%BF%E5%85%A5%E3%81%97%E3%81%BE%E3%81%99%E3%81%8B%EF%BC%9F/967270633/
Amazon RDSで作成したMySQLにリストア
急遽テスト環境が必要だったので、Amazon RDSでMySQLを作成してリストア
MySQLの作成方法は省略、セキュリティーグループさえ作れれば、基本デフォルトです。
MySQL接続
pgadmin4インストール
https://www.pgadmin.org/download/pgadmin-4-windows/
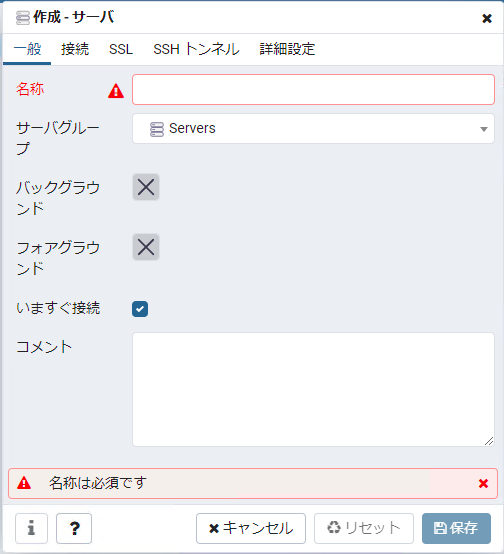
pgadmin4起動、メニュー>オブジェクト>作成>サーバー
ダイアログに接続情報を設定します。
名称は適当に設定します。

ホスト名/アドレス名にはエンドポイントを記載します
エンドポイントは以下で確認できます
RDS>データベース>該当データベースを選択

ユーザー名、パスワードはRDSで登録したものに変更してください。
リストア
pgAdminからのリストアは非プレーン形式のみのようです
今回使うdumpがプレーン形式のため、
psqlコマンドを使ってリストアします。
windoes環境でpgAdminをインストールすると、
psqlは以下にインストールされているため、以下まで移動します。
pgAdmin 4\v4\runtime
リストアで使うDBはpgAdminで作成しておきます。
以下のコマンドでリストアを行います。
パスワードを要求されるので、正常に入力後リストアが開始されます。
psql --host "ホスト名" --port "ポート番号" -U ユーザー名 -d 作成したDB名 -f xxx.dump
【Java】jsonからcsvにする
久しぶりにjavaでjsonとcsvを扱うことがあったのでメモ
ライブラリはjacksonを使います
サンプルのjson
[
    {
        "id": 1,
        "name": "xxxx",
        "stgflag": true,
        "info": [
            {
                "info_id": "info_xxxx01",
                "info_text": "textxxxx01"
            },
            {
                "info_id": "info_xxxx02",
                "info_text": "textxxxx02"
            }
        ]
    },
    {
        "id": 2,
        "name": "yyyy",
        "stgflag": false,
        "info": [
            {
                "info_id": "info_yyyy02",
                "info_text": "textyyyy01"
            },
            {
                "info_id": "info_yyyy02",
                "info_text": "textyyyy02"
            }
        ]
    }
]
jsonからObjectへ変換
準備
getter,setterは省略
public class Sample {
    private int id;
    private String name;
    private boolean stgflag;
    private List<Info> info;
}
public class Info {
    private String info_id;
    private String info_text;
}
実行
private void sample() throws FileNotFoundException, IOException {
    ObjectMapper mapper = new ObjectMapper();
    try (FileInputStream br = new FileInputStream("sample.json")) {
        List<Sample> sampleList = mapper.readValue(br, new TypeReference<List<Sample>>() {});
        sampleList.stream().forEach(a -> {
            System.out.println(a.getId() + " " + a.getName());
            a.getInfo().stream().forEach(b -> System.out.println(b.getInfo_id() + " " + b.getInfo_text()));
        });
    }
}
結果
1 xxxx
info_xxxx01 textxxxx01
info_xxxx02 textxxxx02
2 yyyy
info_yyyy02 textyyyy01
info_yyyy02 textyyyy02
ObjectからCSVへ変換
準備
getter,setterは省略
public class CsvSample {

    private int id;
    private String name;
    private boolean stgflag;
    private String info;
}
実行
private void sample() throws FileNotFoundException, IOException {

    ObjectMapper mapper = new ObjectMapper();
    try (FileInputStream br = new FileInputStream("sample.json")) {
        List<Sample> sampleList = mapper.readValue(br, new TypeReference<List<Sample>>() {});

        CsvMapper csvmapper = new CsvMapper();
        CsvSchema schema = csvmapper.schemaFor(CsvSample.class).withHeader();

        List<CsvSample> csvSampleList = new ArrayList<>();
        for (Sample sample : sampleList) {
            CsvSample row = new CsvSample();
            row.setId(sample.getId());
            row.setName(sample.getName());
            row.setStgflag(sample.isStgflag());
            row.setInfo(mapper.writeValueAsString(sample.getInfo()));
            csvSampleList.add(row);
        }
        System.out.println(csvmapper.writer(schema).writeValueAsString(csvSampleList));
    }
}
結果
id,info,name,stgflag
1,"[{""info_id"":""info_xxxx01"",""info_text"":""textxxxx01""},{""info_id"":""info_xxxx02"",""info_text"":""textxxxx02""}]",xxxx,true
2,"[{""info_id"":""info_yyyy02"",""info_text"":""textyyyy01""},{""info_id"":""info_yyyy02"",""info_text"":""textyyyy02""}]",yyyy,false
Amazon Linux 2 に Matomo をインストールする
アクセス解析をしたいならGoogleAnalyticsを入れるのが手軽ですが、
諸事情(Googleにデータを渡せない)で入れられないので、
オープンソースのMatomoを使います。
今回は検証目的でAmazon Linux 2にインストールしてみます。
必要なミドルウェア
https://matomo.org/docs/requirements/
インストール手順
Apache
インストール
$ sudo yum install httpd -y
起動
$ sudo systemctl start httpd
起動したらブラウザから表示されることを確認する
一応自動起動するようにしておく
$ sudo systemctl enable httpd.service
PHP
yum install php だと古いバージョンのphpがインストールされてしまうので、
remiリポジトリからphp7.4をインストールします。
インストール
$ sudo wget https://dl.fedoraproject.org/pub/epel/epel-release-latest-7.noarch.rpm
$ sudo rpm -ivh epel-release-latest-7.noarch.rpm
$ sudo yum install -y http://rpms.famillecollet.com/enterprise/remi-release-7.rpm
$ sudo yum-config-manager --enable remi-php74
$ sudo yum install -y php74 php74-php php74-php-fpm
$ sudo ln -s /usr/bin/php74 /usr/bin/php
必要なモジュールもインストール
$ sudo yum install --enablerepo remi -y php74-php-mbstring
$ sudo yum install --enablerepo remi -y php74-php-mysqli
Apache再起動
$ systemctl restart httpd.service
MySQL
デフォルトでMariaDBがインストールされているので、
MariaDBをアンインストールしたあと、MySQLをインストールします。
MariaDBアンインストール
$ sudo yum remove mariadb-libs
$ sudo rm -rf /var/lib/mysql
リポジトリ追加
$ rpm -ivh http://dev.mysql.com/get/mysql57-community-release-el7-8.noarch.rpm
MySQLインストール
$ yum install mysql-community-server
起動
$ sudo systemctl start mysqld
初期パスワードを確認
$ cat /var/log/mysqld.log | grep root
$ mysql -u root -p
Enter password:  // 確認したパスワードを入れる
パスワードを変える
8文字以上かつ英大文字・小文字・数字・記号を含める
set password for root@localhost=password('xxxxx');
Matome用のDBを作成する
create database matomo;
exit
Matomo
$ cd /usr/local/src/
$ sudo wget https://builds.matomo.org/matomo.zip && unzip
$ mv matomo /var/www/html/

$ chown -R apache:apache /var/www/html/matomo
$ chmod -R 0755 /var/www/html/matomo/tmp
以降はブラウザから進めていきます。
以下をブラウザで表示して、手順通り進めてください。
http://xxxxx/matomo
mbstringでエラーになっている場合、
指示通りphp.ini にextention=mbstring.so を追記します。
データベースはさきほど作成したDBを指定します。
参考
UIPresentationControllerでポップアップを作る
やりたいこと
UIAlertControllerではできないようなレイアウトを作る場合、
独自ポップアップにする必要があります。
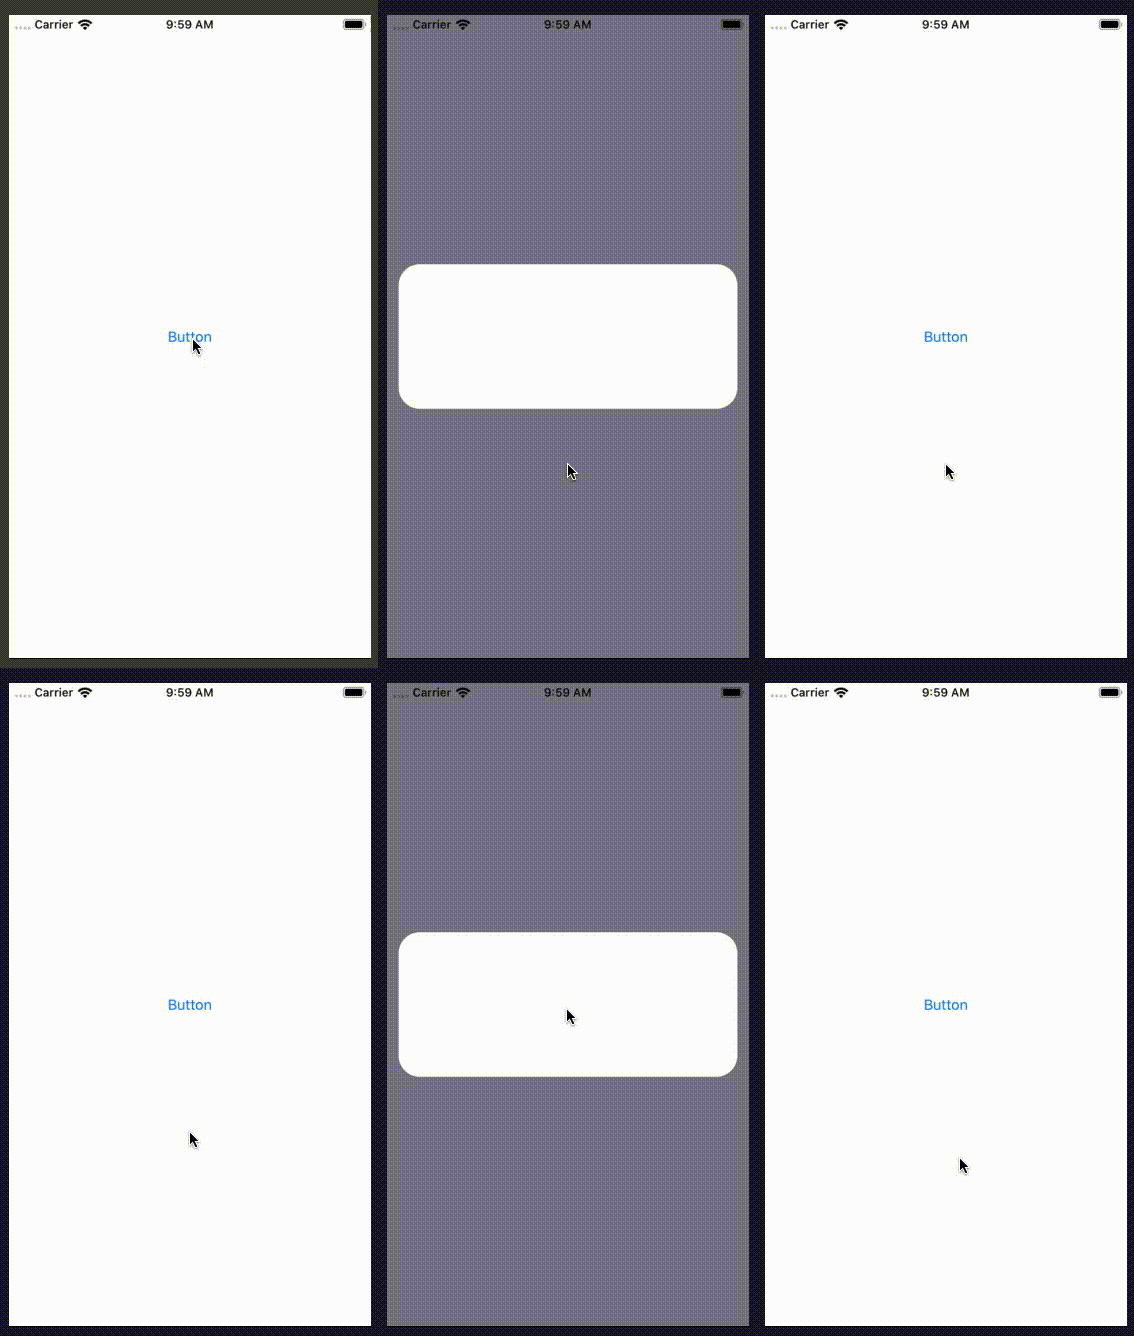
例では背景を押したら閉じる挙動にしています。

どうつくるか
UIPresentationControllerを使います。
一般的なポップアップの動きにしたいので、
UIViewControllerAnimatedTransitioningでアニメーションも調整します
つくりかた
UIPresentationControllerのサブクラスを作る
#import <UIKit/UIKit.h>

@interface PopPresentationController : UIPresentationController

@end
#import "PopPresentationController.h"

@interface PopPresentationController(){
}

@property (nonatomic) UIView *overlayView;

@end

@implementation PopPresentationController

- (void)presentationTransitionWillBegin
{
    [super presentationTransitionWillBegin];

    self.overlayView = [[UIView alloc]init];
    // 表示トランジション開始前の処理
    self.overlayView.frame = self.containerView.bounds;
    self.overlayView.backgroundColor = [UIColor blackColor];
    self.overlayView.alpha = 0.0;
    [self.containerView insertSubview:self.overlayView atIndex:0];

    id <UIViewControllerTransitionCoordinator> coordinator = [self.presentedViewController transitionCoordinator];
    [coordinator animateAlongsideTransition:^(id<UIViewControllerTransitionCoordinatorContext> context) {
        self.overlayView.alpha = 0.5;
    } completion:nil];
}

- (void)dismissalTransitionWillBegin
{
    [super dismissalTransitionWillBegin];
    // 非表示トランジション開始前の処理
    id <UIViewControllerTransitionCoordinator> coordinator = [self.presentedViewController transitionCoordinator];
    [coordinator animateAlongsideTransition:^(id<UIViewControllerTransitionCoordinatorContext> context) {
        self.overlayView.alpha = 0.0;
    } completion:nil];
}

- (void)dismissalTransitionDidEnd:(BOOL)completed
{
    [super dismissalTransitionDidEnd:completed];

    // 非表示トランジション終了時の処理
    if (completed){
        [self.overlayView removeFromSuperview];
    }
}

- (CGRect)frameOfPresentedViewInContainerView
{
    return self.containerView.bounds;
}

- (void)containerViewWillLayoutSubviews
{
    [super containerViewWillLayoutSubviews];

    // レイアウト開始前の処理
    self.overlayView.frame = self.containerView.bounds;
    self.presentedView.frame = self.frameOfPresentedViewInContainerView;
}

@end
UIViewControllerAnimatedTransitioningの実装クラスを作る
#import <Foundation/Foundation.h>
#import <UIKit/UIKit.h>

@interface DialogAnimationController : NSObject<UIViewControllerAnimatedTransitioning>

@property BOOL forPresented;
- (id)init:(BOOL)forPresented;

@end
#import "DialogAnimationController.h"

@interface DialogAnimationController()

@end

@implementation DialogAnimationController

- (id)init:(BOOL)forPresented
{
    self.forPresented = forPresented;
    return self;
}

// アニメーション時間
- (NSTimeInterval)transitionDuration:(nullable id<UIViewControllerContextTransitioning>)transitionContext {
    return 0.2;
}

- (void)animateTransition:(nonnull id<UIViewControllerContextTransitioning>)transitionContext {
    if (self.forPresented) {
        [self presentAnimateTransition:transitionContext];
    } else {
        [self dismissAnimateTransition:transitionContext];
    }
}

// 表示時に使用するアニメーション
- (void)presentAnimateTransition:(nonnull id<UIViewControllerContextTransitioning>)transitionContext
{
    UIViewController *viewController = [transitionContext viewControllerForKey:UITransitionContextToViewControllerKey];
    UIView *containerView = transitionContext.containerView;
    [containerView addSubview:viewController.view];
    viewController.view.alpha = 0.0;
    viewController.view.transform = CGAffineTransformMakeScale(0.8, 0.8);

    [UIView animateWithDuration:[self transitionDuration:transitionContext]
                          delay:0.0f options:UIViewAnimationOptionCurveEaseOut animations:^{
        viewController.view.alpha = 1.0;
        viewController.view.transform = CGAffineTransformIdentity;
    } completion:^(BOOL finished) {
        [transitionContext completeTransition:YES];
    }];
}

// 非表示時に使用するアニメーション
- (void)dismissAnimateTransition:(nonnull id<UIViewControllerContextTransitioning>)transitionContext
{
    UIViewController *viewController = [transitionContext viewControllerForKey:UITransitionContextFromViewControllerKey];

    [UIView animateWithDuration:[self transitionDuration:transitionContext]
                          delay:0.0f options:UIViewAnimationOptionCurveEaseOut animations:^{
        viewController.view.alpha = 0.0;
    } completion:^(BOOL finished) {
        [transitionContext completeTransition:YES];
    }];
}

@end
ポップアップ用のViewControllerをつくる
storybordには閉じる用のボタンを画面全体に配置

#import <UIKit/UIKit.h>
@interface SamplePopUpViewController : UIViewController<UIViewControllerTransitioningDelegate>

@end
#import "SamplePopUpViewController.h"
#import "PopPresentationController.h"
#import "DialogAnimationController.h"

@interface SamplePopUpViewController ()
{
    BOOL initContent;
}
@property (weak, nonatomic) IBOutlet UIView *popview;

@end

@implementation SamplePopUpViewController

- (id)initWithCoder:(NSCoder*)decoder
{
    self = [super initWithCoder:decoder];
    self.transitioningDelegate = self;
    self.modalPresentationStyle = UIModalPresentationCustom;
    if (!self) {
        return nil;
    }
    // write something.

    return self;
}

- (void)viewDidLoad {
    [super viewDidLoad];
    // Do any additional setup after loading the view.
}

- (void)viewDidLayoutSubviews {
    [super viewDidLayoutSubviews];

    if (initContent){
        return;
    }
    initContent = YES;
    _popview.layer.cornerRadius = 22.0;
}

- (IBAction)closeButtonAction:(id)sender {
    [self dismissViewControllerAnimated:YES completion:nil];
}

- (UIPresentationController *)presentationControllerForPresentedViewController:(UIViewController *)presented presentingViewController:(UIViewController *)presenting sourceViewController:(UIViewController *)source
{
    return [[PopPresentationController alloc]initWithPresentedViewController:presented presentingViewController:presenting];
}

- (id<UIViewControllerAnimatedTransitioning>)animationControllerForPresentedController:(UIViewController *)presented presentingController:(UIViewController *)presenting sourceController:(UIViewController *)source
{
    return [[DialogAnimationController alloc] init:YES];
}

- (id<UIViewControllerAnimatedTransitioning>)animationControllerForDismissedController:(UIViewController *)dismissed
{
    return [[DialogAnimationController alloc] init:NO];
}
@end
つかいかた
UIStoryboard *storyboard = [UIStoryboard storyboardWithName:@"SamplePopUp" bundle:nil];
SamplePopUpViewController *viewcontroller = [storyboard instantiateViewControllerWithIdentifier:@"SamplePopUp"];
[self presentViewController:viewcontroller animated:YES completion:nil];
GitHub
UIAlertControllerを自動で消す
ボタンを押さずに画面に表示されているAlertを消す方法
例えば何かの処理が終わった後や、強制的に画面遷移するときに使う
やりかた
UIViewController *presentedViewController = [UIApplication sharedApplication].keyWindow.rootViewController.presentedViewController;
if([presentedViewController isKindOfClass:NSClassFromString(@"UIAlertController")]){
 [presentedViewController dismissViewControllerAnimated:NO completion:nil];
}
presentedViewControllerで最前面のUIViewControllerを取得します。
このUIViewControllerがUIAlertControllerの場合は閉じます。
iOS13の場合
Target iOS13の場合はkeyWindowが非推奨のため使えません。
こちらを参考に以下のように取得します。
How to resolve: 'keyWindow' was deprecated in iOS 13.0
+(UIWindow*)keyWindow
{
    UIWindow        *foundWindow = nil;
    NSArray         *windows = [[UIApplication sharedApplication]windows];
    for (UIWindow   *window in windows) {
        if (window.isKeyWindow) {
            foundWindow = window;
            break;
        }
    }
    return foundWindow;
}
iOS13 SceneDelegateがあるプロジェクトでpush遷移
はじめに
久々に新規プロジェクトを作ったら見慣れないSceneDelegateが追加されていた。
push遷移するための処理をAppDelegateに書くものだと思ったら、 こちらに書くことに気づかず時間がかかってしまった。
対応
willConnectToSessionにNavigationControllerの定義を書く
Main.storyboardにはStoryboardIDを設定しておく
- (void)scene:(UIScene *)scene willConnectToSession:(UISceneSession *)session options:(UISceneConnectionOptions *)connectionOptions {

    UIStoryboard *storyboard = [UIStoryboard storyboardWithName:@"Main" bundle:nil];
    ViewController *controller = [storyboard instantiateViewControllerWithIdentifier:@"ViewController"];

    UINavigationController *navigationController = [[UINavigationController alloc] initWithRootViewController:controller];
    navigationController.view.backgroundColor = [UIColor whiteColor];
    navigationController.viewControllers = @[controller];
    self.window.rootViewController = navigationController;
    [self.window makeKeyAndVisible];
}